I went to 'Straatnieuws' yesterday, and was in for a big surprise: the editor likes…
Receipe
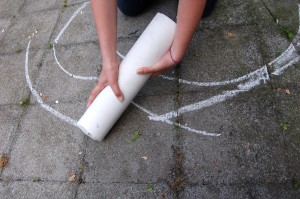
I’ve been writing down the receipe for the giant chalk I made for the Jaarbeursplein action. The Straatnieuws center page will be a do-it-yourself page & I thought it would be amusing to have a receipe. Here goes:
Receipe for giant chalk
This is what you neet to make six chalks of 45 cm length and 10 cm diameter:
For the molds:
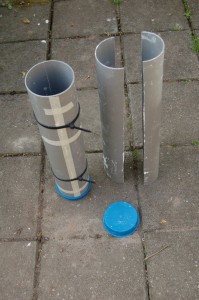
- two pvc tubes of 50 cm length and 10 cm diameter, sawn in half lengthwise
- two caps for the pvc tubes
- a roll of tape
- tiewraps
- some washing-up liquid
- a wiper
 For the container:
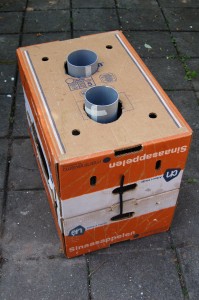
- two identical carton boxes
- a pencil
- a stanley nife
- tiewraps
For the plaster:
- some garbage bags
- a 5-liter bucket
- a measuring cup
- a stick to stir with
- a large spoon
- 25 kg artist’s plaster
- water-solvable colourant
We will make two chalks at a time. If you have prepared the molds beforehand, and gathered all materials, making the two chalks will take about an hour. Letting the chalks dry will take half a day (in the oven) or a day (in the sun). 
- Gather everything you need in a place where you have room and where spilling will not be a problem;
- Take one of the boxes and draw the shape of the cap twice on the bottom of the box. Cut out two circles that are just a little bigger than these circles.
- Tie the two boxes together with tie wraps. This is the container for the molds
- Put some washing up liquid on a wiper and rub it on the inside of the tubes and the cap. This makes it easier to release the chalk from the mold later on.
- Spread the garbage bags over your worktop and place the container, the plaster, the bucket, the spoon and the stick on it.
- Connect the pvc tube halves with tape and tie wraps. Tape the caps firmly to the underside of the tubes. If you have done this right there are no gaps. Tie wraps are for extra strength, plaster is rather heavvy;
- Put the molds in the container, open end up. Check to see if the molds go in and out of the container with ease, cut the opening a bit bigger if needed;
- Measure 5 liters of water and pour in the bucket. Add colorant if you want to, a lot, the chalk makes a fiery red into pale pink;
- Now make sure you will not be disturbed for a 1/2 hour;
- Dissolve the plaster in the water by scattering spoonfuls on the surface, then stir. Try to make sure the mixture doesn’t get lumpy. The stuff should get the consistency of yoghurt eventually. If it is too thick, add some more water. Don’t stop stirring – plaster will firm up in 10 minutes time.
- Fill both molds up. It doesn’t matter if there is a little plaster escaping through a gap, this you can scrape of later. Careful with the plaster, it can become quite warm while firming up;
- Let your bucket, spoon and stick dry. Dry plaster is easy to remove. If you like rinsing better, don’t pour the waste through the drain, it will clog up. Pour it under a bush somewhere;
- Let the molds be for 1 1/2 hr to allow the plaster to firm completely;
- Get the molds out of the container and put them on your worktop;
- Open the molds – careful, the plaster isn’t strong yet – and put the crayons in the oven for 1/2 day or in the sun for a day;
- Ready! And have fun!
| « Subscribe | <-- previous post | next post --> | The day after » |
|---|


